
|
Listen to Podcast of the post
 |
This blog post is part of my ongoing project to build a robot that has an existential crisis. This is an inspiration from Rick and Morty‘s “Pass The Butter” robot. We will try to add facial recognition and make the bot ask “Hello Ganga, What is my purpose?”, whenever it recognizes me in the room.
We will leverage Open CV for face detection and Amazon Rekognition for facial recognition. More posts and references would be added to this blog series, while I try to give character to the bot.
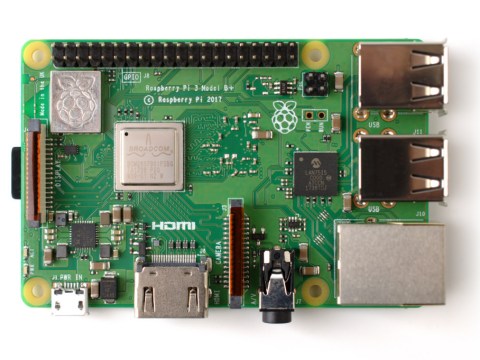
Hardware Used:
- Raspberry Pi 3 Model B+.
- Raspberry Pi Camera Module.
- RaspiAudio MIC+ hat.
Software Used:
- Open CV – Incase you missed, refer the article on “How to install OpenCV on Raspberry Pi 3B+“.
- AWS Rekognition.
- ESpeak.
Design
Our high-level design is as below. I will be explaining the design decisions as we implement the various components.

Setting up AWS Rekognition
Login to aws console and create a new IAM user which has only Programmatic access. Provide administrative rights to Rekognition. (Do not use your root account credentials, as a best practise). Refer the amazon developer guide, if you need more assistance.

Copy the “Access key ID” and “Secret access key”. You will need this later while implementing facial recognition.
Install AWS SDK for Python on Raspberry Pi
SSH into your Raspberry Pi. Install latest version of Boto 3 (AWS SDK for Python) and AWS CLI.
pip install boto3
sudo pip install awscli
Setup authentication credentials for boto3 with AWS key ID and Secret access key setup, which we configured earlier.
aws configure
AWS Access Key ID [None]:  YOUR_ACCESS_KEY_ID
AWS Secret Access Key [None]: YOUR_SECRET_ACCESS_KEY
Default region name [None]: us-east-1
Default output format [None]: ENTER
Create a collection on recognition. We will use this collection to add faces for each known person.
aws rekognition create-collection --collection-id "chappie-faces"Add code to capture image and add to collection
Next, we create a python script to capture image using the Pi Camera module and add it to the collection we created.
mkdir chappie-facial-recognition
cd chappie-facial-recognition
mkdir faces
sudo nano add_faces.py
Create a file ‘add_faces.py’
sudo nano add_faces.pyBelow is the code for the python script. You can also download the code from GitHub.
You can test the script as below, to ensure everything is working. The script will capture an image using pi camera and save the image with a timestamp in faces folder. The saved image is then add to recognition collection.
python add_faces.py --collection "chappie-faces" --name "YOUR_NAME"Make your Raspberry Pi speak
A simple method to make your pi speak is to use Text To Speech (TTS). I am using espeak for offline text to speech capability. Of course, there are other services from google and amazon pollycast.
sudo apt-get install espeak
sudo apt-get install espeak python-espeak
Facial recognition and existential crisis.
We will use OpenCV for face detection and Amazon Rekognition for facial recognition. Amazon calls facial recognition as face compare.
I am using OpenCV for face detection instead of Amazon Rekognition to reduce the number of API calls to AWS.
Create a file ‘recognize_face.py’
sudo nano recognize_face.pyBelow is the code for the python script. You can also download the code from GitHub.
We are now ready to test the script. The script will capture an image using pi camera and Open CV. If Open CV detects a face, the captured frame is saved to faces folder with a timestamp. The saved image is then searched in the recognition collection.
python recognize_face.pyIf you have any feedback or any experience to share in this space, I’m all ears.
Hi, Tried to proceed all the steps, and finally get the error upon run “recognise_face.py”, would you please help?
Traceback (most recent call last):
File “recognize_face.py”, line 102, in
main()
File “recognize_face.py”, line 51, in main
if not face_cascade.load(cv.samples.findFile(face_cascade_name)):
Paste the error again
Traceback (most recent call last):
File “recognize_face.py”, line 102, in
main()
File “recognize_face.py”, line 51, in main
if not face_cascade.load(cv.samples.findFile(face_cascade_name)):
AttributeError: ‘module’ object has no attribute ‘samples’
Did your opencv build succeed?
Yes….I replace the source with opencv-3.4.6, with different error message as below.
Traceback (most recent call last):
File “recognize_face.py”, line 102, in
main()
File “recognize_face.py”, line 80, in main
face_detected, image = detectFace(frame,face_cascade)
File “recognize_face.py”, line 26, in detectFace
flags = cv.CASCADE_SCALE_IMAGE)
cv2.error: OpenCV(3.4.6) /home/pi/opencv-3.4.6/modules/objdetect/src/cascadedetect.cpp:1698: error: (-215:Assertion failed) !empty() in function ‘detectMultiScale’
Tried to change the permission of folder “opencv-3.4.6” but no luck.
Hi Ganga, finally solved the problem by adding the full path in file “recognise_face.py”:
face_cascade = cv.CascadeClassifier(‘/home/pi/opencv/data/haarcascades/haarcascade_frontalface_alt2.xml’)